
Dartfish Software 2026 Update 2 adds new layout and team tools to the Tagging Panel Editor: buttons laid out on a hexagonal grid, players shown as shirts in their team colors, and several players managed at once in the Team Manager.
This short video gives you a brief overview of the feature
Purpose and Scope
A tagging panel is faster to use when its buttons look like what they stand for: actions grouped in a compact block, players recognizable at a glance by their number and team colors. This article covers the new hexagonal grid, the shirt symbols of the Players Group Box and the multiple selection of players in the Team Manager, on an existing panel. The screenshots show a tennis panel; the same steps apply to any sport.
What you can do
- Lay out buttons on a honeycomb, one button per hexagonal cell
- Show the players of a team as shirts, with their number or initials and their own colors
- Choose whether the Team Manager or the panel decides the colors of the player buttons
- Check, uncheck, move or remove several players at once in the Team Manager
Requirements
- You must have myDartfish 360S or above to create a tagging panel.
- Open your panel in the Tagging Panel Editor: Tagging > Edit Panel (Ctrl+Alt+T).
- To show players, the panel must contain a Team Manager with at least one team, and a Players Group Box linked to it. Teams and players are defined in Manage Teams & Players.
Step-by-step guide
1. Lay out buttons on a hexagonal grid
- In the ToolBox, open Panel Layout Tools and drag Hexagonal Grid into a Group Box that has a Category. The grid has none: its buttons take the category of the box around it.
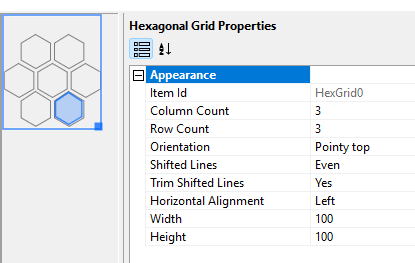
- Set the shape of the grid in its properties, under Appearance:
- Column Count and Row Count: 1 to 15 (3 × 3 for a new grid)
- Orientation: Pointy top (a vertex on top) or Flat top (an edge on top)
- Shifted Lines: Odd or Even, the lines shifted by half a cell
- Trim Shifted Lines: Yes removes the cell that would stick out at the end of each shifted line
- Horizontal Alignment: Stretch makes the grid fill the width of its box
- Drop your buttons on the cells:
- Drop a button on a free cell to place it. Dropped outside the cells, it takes the first free cell.
- Drag a button of the grid onto an occupied cell: the two buttons swap places.
- Select a button of the grid and press Ctrl+V: the copied buttons fill the free cells from that one.
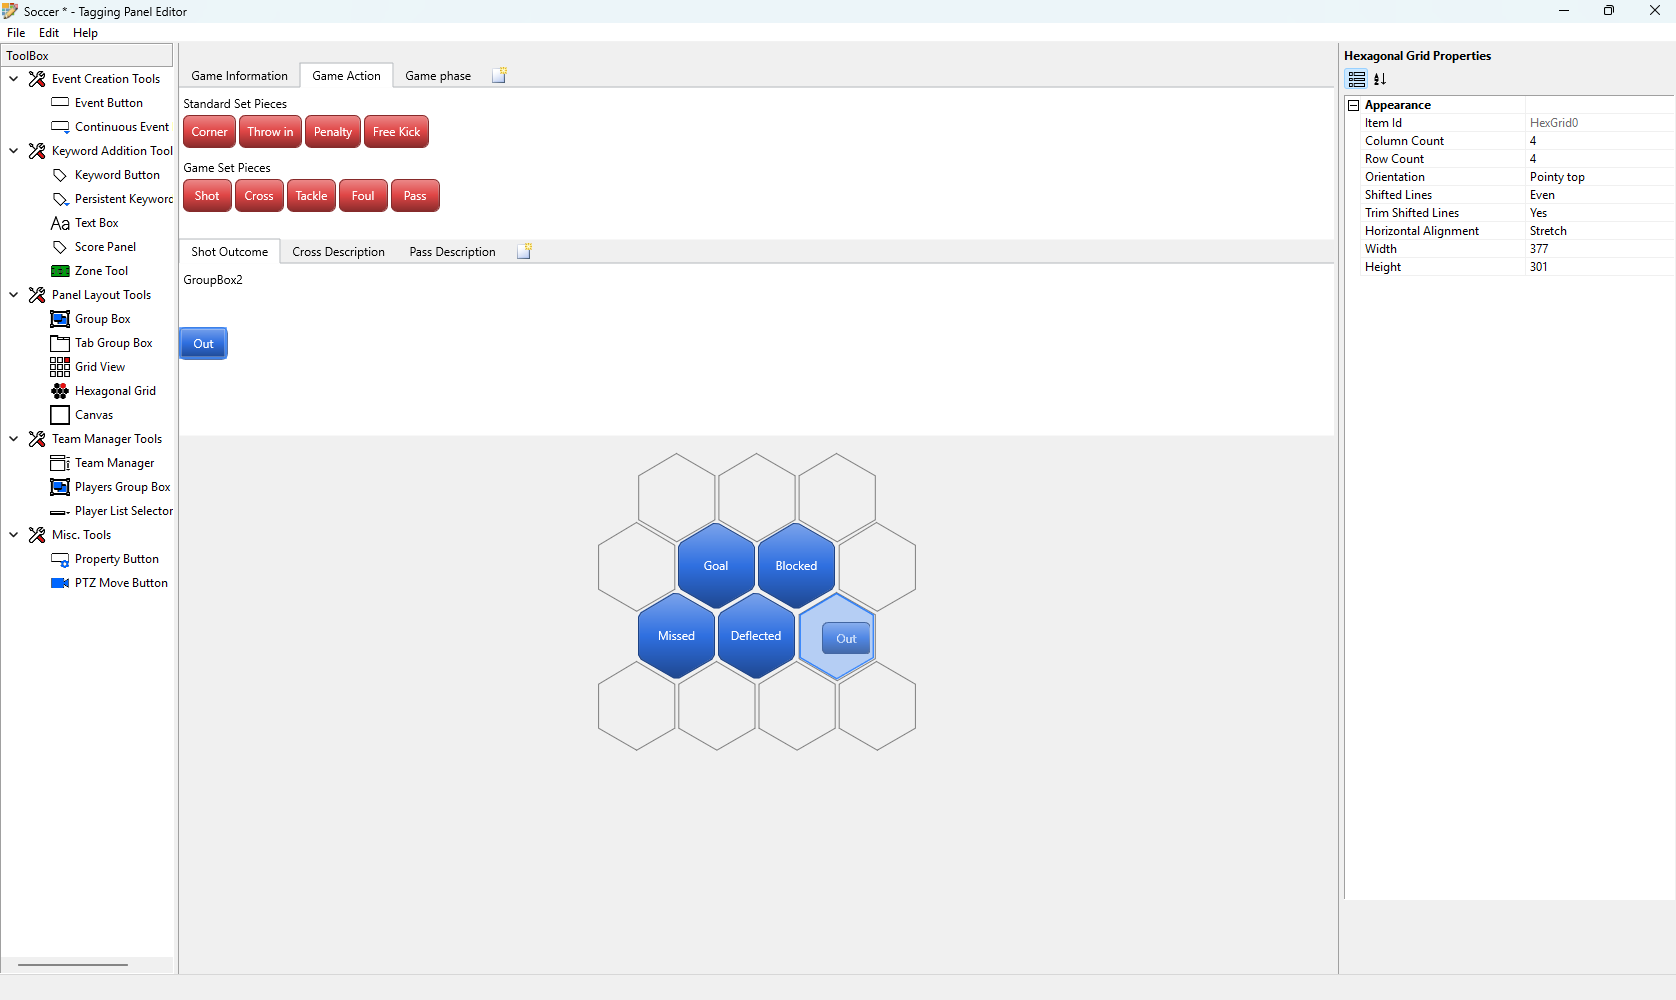
Result: the buttons are laid out on a honeycomb, one per cell. For example, with Column Count 4, Row Count 2 and Trim Shifted Lines on Yes, seven buttons form a compact block: four on the first row, three nested between them on the second.
2. Show players as shirts
This video shows how to add a team database.
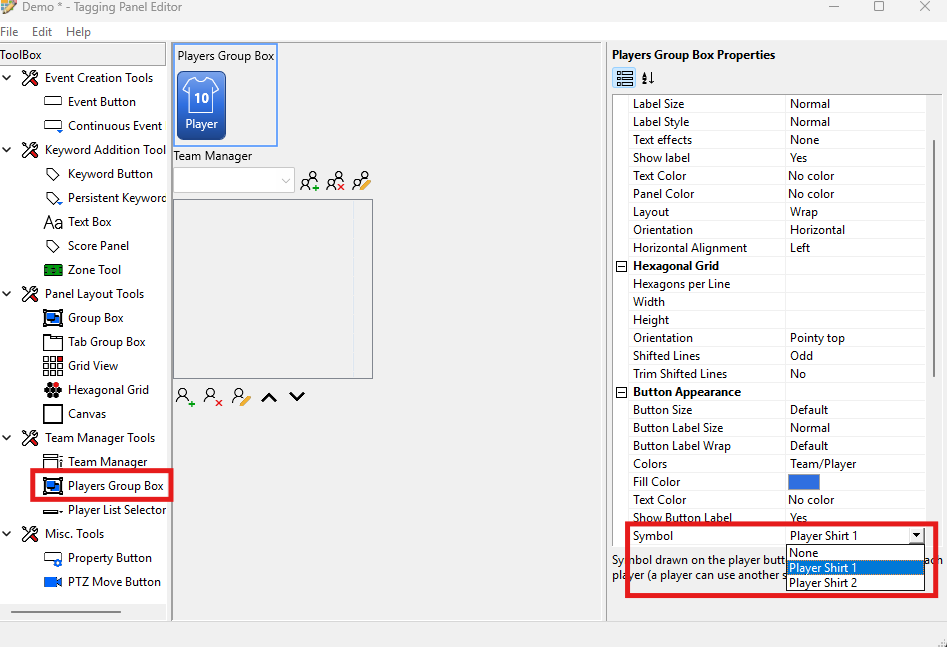
- Select the Players Group Box. In the Button Appearance group, set Symbol to Player Shirt 1 or Player Shirt 2, then choose the Symbol Color and the Shirt Size (Small, Medium, Default, Large).
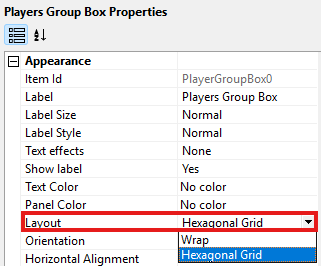
- To place one player per hexagon, set Layout to Hexagonal Grid.
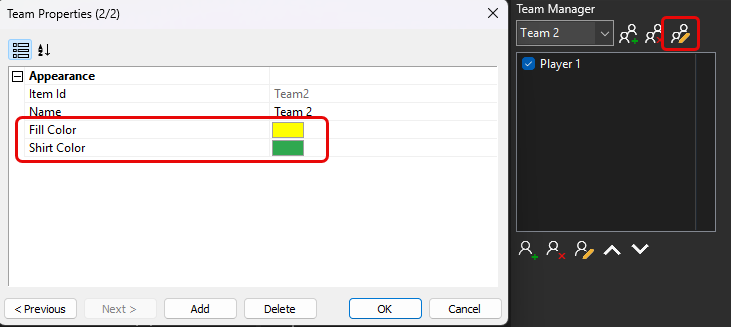
- Close the Tagging Panel editor. Then in the Team Manager, click Edit Team. A new Team Properties window opens where you can set the Fill Color (the button) and the Shirt Color for all the players of the team.
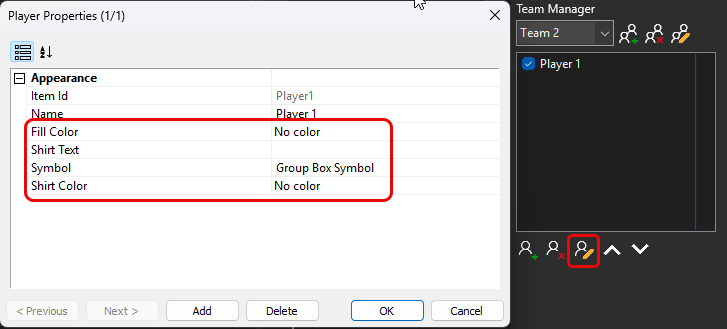
- To give a player their own look, select the player, click Edit, and set the Shirt Text (a number or initials), the Shirt Color and the Fill Color.
Result: each player appears as a shirt in the team colors. For example, with a red Shirt Color for the team and a yellow one for one player with Shirt Text 1, all the shirts are red, except this player's, which is yellow with the number 1.
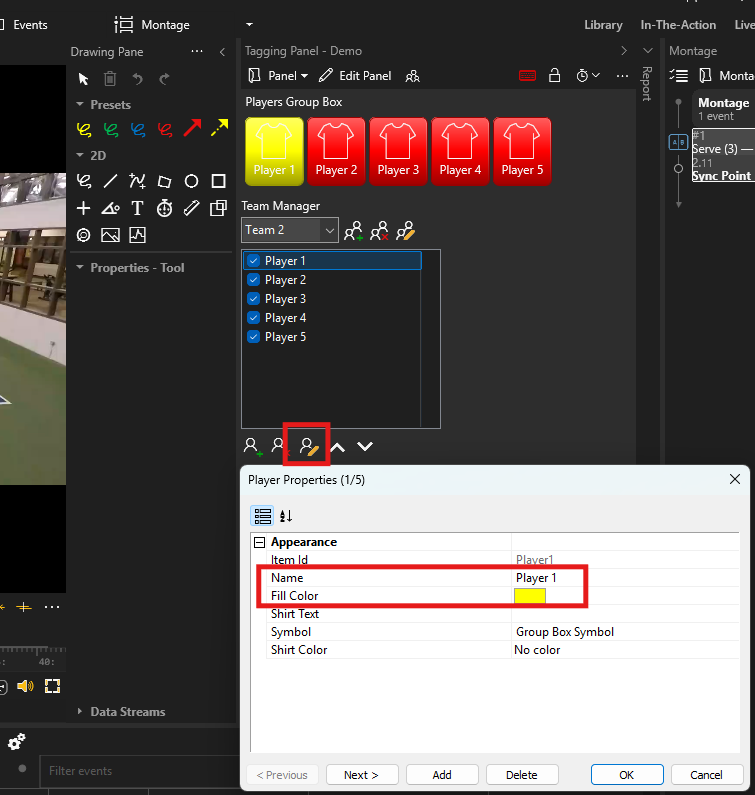
Note: the colors of a player win over those of the team, which win over those of the Players Group Box. To always use the colors of the Players Group Box, set its Colors property to Panel; the default, Team/Player, keeps the colors of the Team Manager.
3. Manage several players at once
- In the player list of the Team Manager, select several players.
- Choose what to do with them:
- Right-click > Check Selected Players or Uncheck Selected Players: shows or hides them in the linked Players Group Box
- Move Up / Move Down: moves them together
- Remove Team Member: deletes them, after confirmation
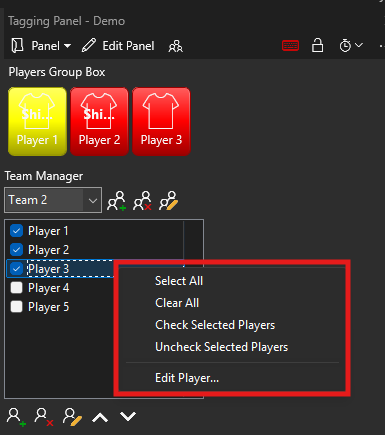
Result: the change applies to all the selected players, and the buttons of the Players Group Box follow the order of the list.
Notes / Limitations
- Four button types only. A hexagonal grid holds Event, Continuous Event, Keyword and Persistent Keyword Buttons, one per cell.
- Reducing the grid hides buttons. Lowering Column Count or Row Count hides the buttons whose cell disappears; they come back when you raise it again.
- No free cell, no paste. When the grid is full, Ctrl+V cannot place the copied buttons.
- The shirt stays on the panel. The shirt number and color are not copied to the event: the event receives the player's name as a keyword.
Tips and best practices
- Use a hexagonal grid for buttons that are used together: a compact block is faster to reach than a long row.
- Set the team colors once with Edit Team, and give a player their own colors only for the exceptions.
- Use the colors of the real outfit and a short Shirt Text (number or initials): the right player is found at a glance during a live session.
FAQ
Why don't my player buttons use the color I chose in the editor?
The colors set in the Team Manager for the player or the team win over those of the Players Group Box. Set the Colors property of the Players Group Box to Panel to always use its own colors.
Why doesn't a player appear in the Players Group Box?
Check that the Team Manager Link property of the Players Group Box points to the Team Manager (otherwise it shows ! No team manager linked in red), that a team is selected and that the player is checked.
See also
Create a Dartfish 10 tagging panel — building a panel from scratch.
Manage Team & Players — teams, players and import from a CSV file.
Tagging in Dartfish - Complete Guide — the tagging tools and the panel in use.