
Dartfish Software 2026 Update 2 adds a timeline view and grouping to the Events pane, so you can see when events happened and work on them keyword by keyword.
Purpose and Scope
A list of events tells you what was tagged, not when. The timeline view draws each event on a time scale, one lane per keyword, so that patterns stand out at a glance; grouping splits the list by keyword, so that you can act on a whole group at once. This article covers the timeline view, time ranges, category filtering, lane colors and grouping. The screenshots show a tennis match; the same steps apply to any sport.
What you can do
- See when each event happened, one lane per keyword
- Keep only the events of a period of time, such as one half or one set
- Show only the categories you need and make a keyword stand out with its own color
- Group the list by keyword and act on a whole group at once
Requirements
- You must have myDartfish 360S or above.
- Open the Events pane (Ctrl+Shift+E) in the Live or Replay workspace, with a video that contains tagged events.
Step-by-step guide
1. See when events happened
- On the toolbar of the Events pane, click Timeline View. Grid View goes back to the list.
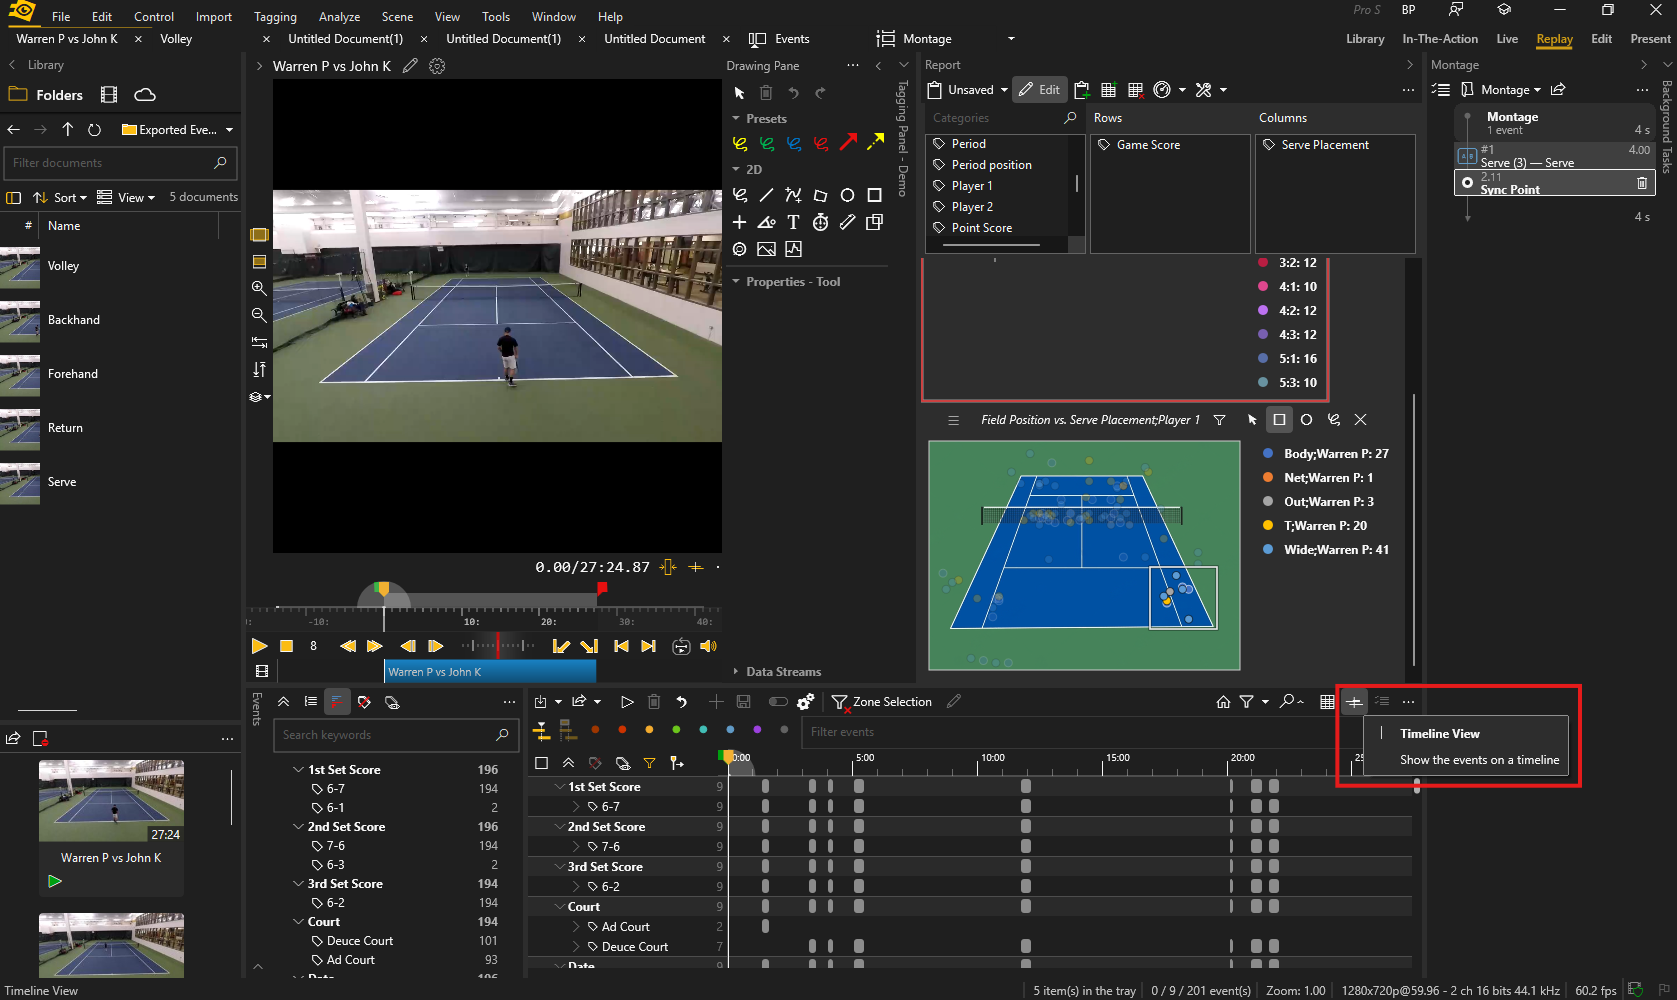
- Read the lanes: there is one lane per keyword category; click its triangle to show one lane per keyword value.
- Move around the timeline:
- Ctrl + mouse wheel: zoom in or out at the pointer
- Shift + mouse wheel: scroll in time
- Ctrl+0, or double-click the top-left corner: show the whole video again
- Follow Playhead (on by default): keeps the playhead in view while playing or recording
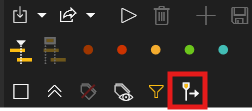
- Select and play events:
- Click a bar to select the event and move the playhead to it; Ctrl+click adds or removes an event
- Click the check box of a lane to select all its events
- Double-click a bar to play the event
Result: each event appears as a bar on its lane, at the time it happened. Hover over a bar to see the event's name, in and out times, duration and description.
2. Focus on a period of time
A time range filters the list: only the events that overlap it remain, in the timeline and in the grid.
- Draw the range: Ctrl+drag on the ruler or the tracks, then drag its handles to adjust it. Or right-click the tracks, the ruler or an event, then choose Set Selection In-Point and Set Selection Out-Point at the playhead, Set Selection to Play Range, or Set Selection to Selected Events (from the first to the last selected event).
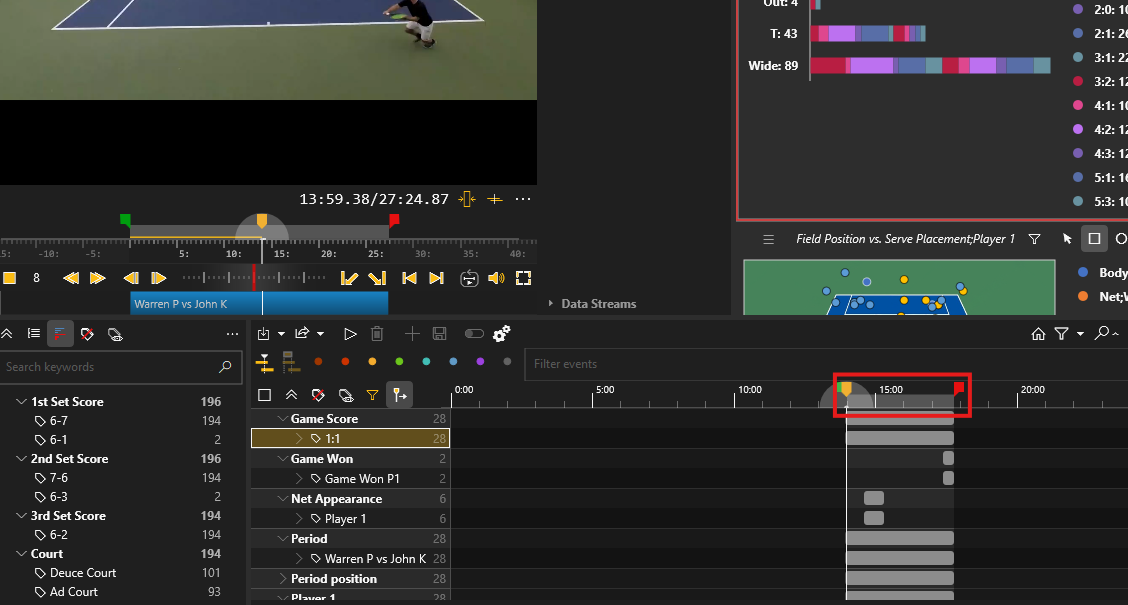
- Click Zoom to Selection to make the range fill the width of the timeline.
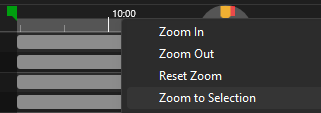
- To remove the range, click Reset Selection.
Result: only the events of the period remain. For example, to review the second half only, move the playhead to the start of the half and choose Set Selection In-Point, then to its end and choose Set Selection Out-Point, then choose Zoom to Selection to see the half across the whole width.
3. Show only the categories you need
- Click Filter Categories... on the timeline toolbar. The list shows each category with its number of events.
- Check the categories to show.
You can also select the lanes to keep with Ctrl+click on their names, then right-click a lane and choose Show only categories of selected keywords.
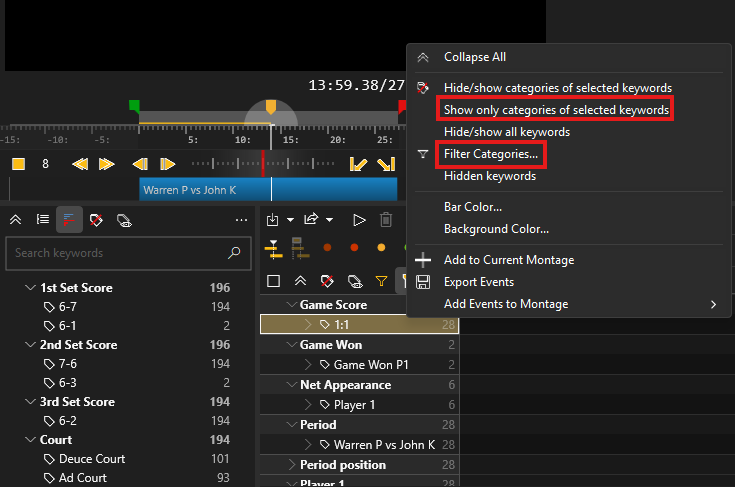
Result: only the checked categories remain in the timeline. The Filter Categories... button stays highlighted while some categories are hidden.
4. Make a keyword stand out
- Right-click the lane of a category or of a keyword value.
- Choose Bar Color... (the color of its event bars) or Background Color... (the color behind the lane), then pick a color. In the color picker, Event Colors restores the colors of the events and No color removes the background.
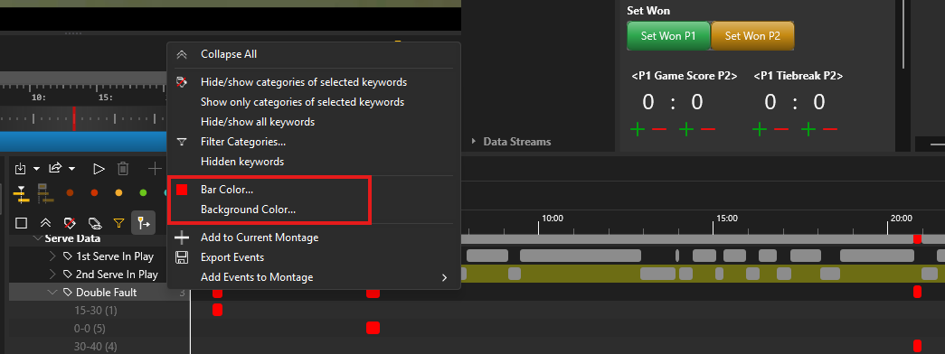
Result: the lane takes the chosen color. For example, give the bars of one outcome value a bright color, then collapse its category: the bar of the category now shows at a glance when this outcome happened during the video.
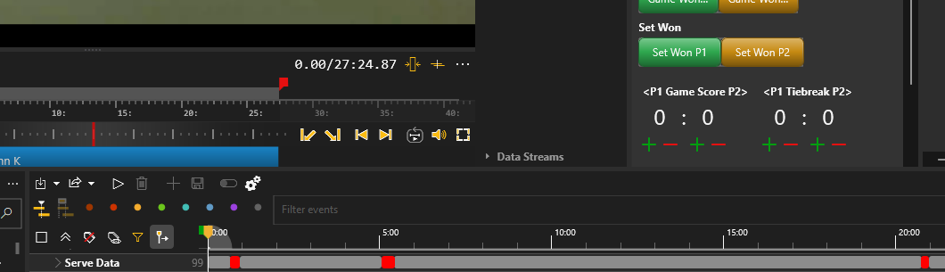
Note: these colors only change the timeline. The events keep their own color in the list and in the Report.
5. Group the list by keyword
- In Grid View, right-click a column header, then Group By > the category. The list is split into one group per keyword value, each with its header.
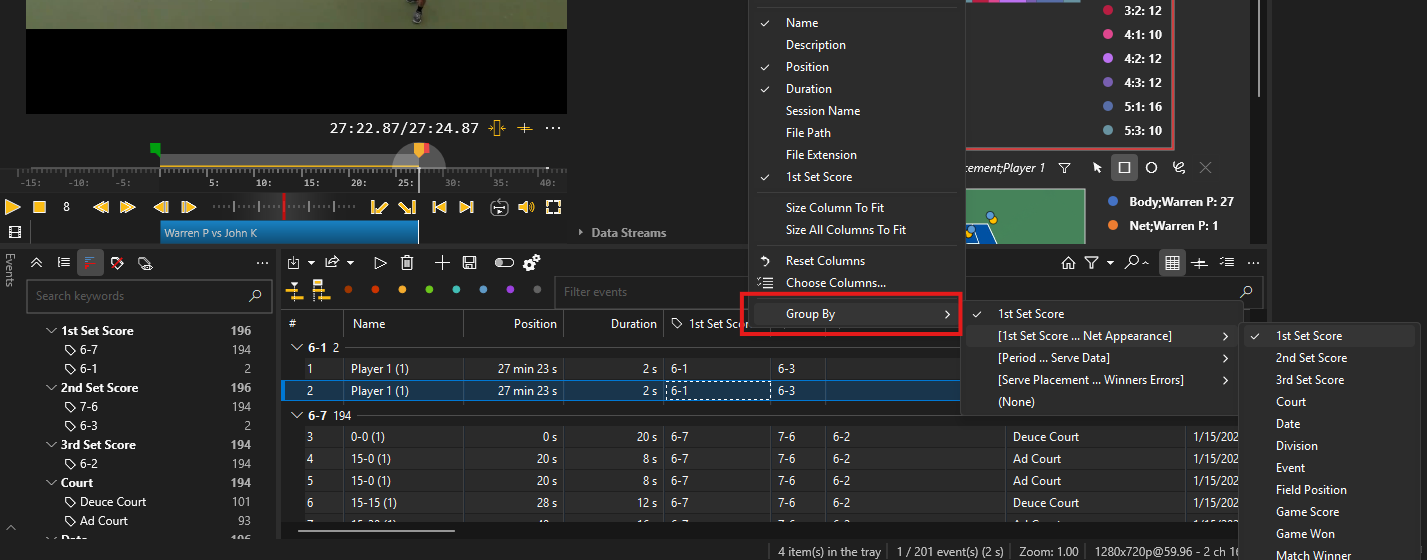
- Right-click a group header to:
- Collapse Group / Expand Group, or all groups at once
- Select Events of the group
- Run an action rule, Add Events to Montage or Copy Events Data To Clipboard on the events of the group
- Ungroup, the same as Group By > (None)
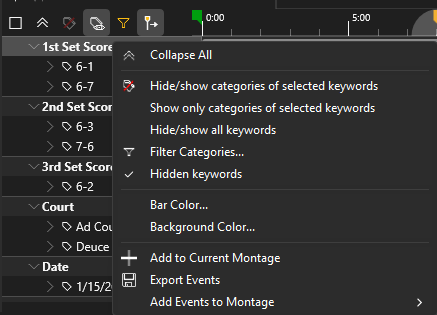
Result: you act on a whole group at once. For example, group the list by the category of your players, right-click a player's group header, then choose Add Events to Montage > Current Montage to prepare a review of that player.
Note: in the timeline, the same actions are available on a lane: right-click its name, then choose an action rule or Add Events to Montage.
Notes / Limitations
- Saved with the tagging panel. The lane colors, hidden categories and expanded lanes are saved with the tagging panel.
- Category colors. The color of a category applies to its values that have none of their own.
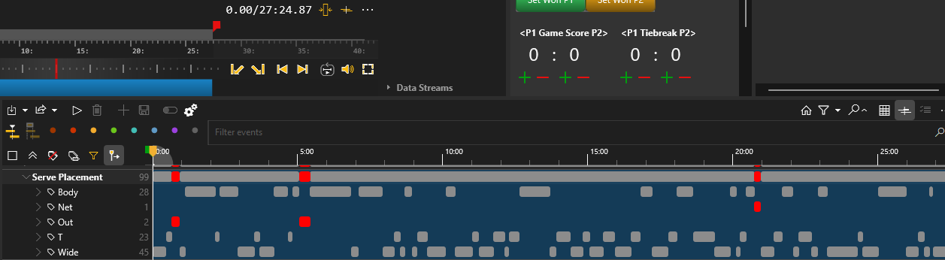
- Merged bars. Events too close to be drawn separately are merged into one bar labelled with their number, for example 5 events: click it to zoom in on them.
- Group order. Choosing the same category again in Group By reverses the order of the groups.
Tips and best practices
- After setting a time range, use Zoom to Selection to read the period across the whole width.
- Color one keyword value, then collapse its category: its moments stand out in the category bar.
- To filter further, click keywords in the Keywords pane (Ctrl+click to add more).
FAQ
Why are my lane colors gone on restart ?
Lane colors, hidden categories and expanded lanes are saved with the tagging panel of the computer, not in the document.
Why is the Filter Categories button highlighted?
Some categories are hidden. Click Filter Categories... and check them again to show them.
See also
Advanced Filtering — filtering events by keyword and saving filters.